So yeah, sorry about no weekly meal plan last week! I did however learn a very valuable lesson... I need to PLAN my meals so I eat healthier! Even if I am busy with school, homework, socializing and house stuff, it's worth it so sacrifice the time needed to plan a menu NO MATTER WHAT! Sheesh, I am glad I know now though.
Now onto this weeks meal plan.
Sunday: Garlic Roasted Veggies with Hard Boiled Eggs and Toasted French Bread (sounds weird, but it was quite tasty!)
Monday: Spaghetti with Chicken Meatballs
Tuesday: Potato Casserole (some kind of cheesy saucy goodness will ensue!)
Wednesday: Chicken Enchiladas in Red Sauce
Thursday:Vegetable Curry and Rice
Friday: Chicken Fried Steak with Mashed Potatoes
Saturday: Hot Dogs with Sweet Potato Fries
Sunday, November 13, 2011
Tuesday, November 1, 2011
Roasted Cauliflower and Garlic Soup
This was super easy and super good!
2-3 Servings (if you serve a cup with a good size salad it'll feed 4 though)
Recipe:
1/2 Large Cauliflower (or 1 small one), florets cut up to a medium size (see picture below if you need to gauge size)
3-4 tsp Garlic, diced (3-4 cloves)
1 tsp Salt
1 tsp Pepper
2 tbs Olive Oil
1 tbs Butter, melted
1 14.5oz can Reduced Sodium Chicken Broth, heated before adding to blender
1/4 cup Parmesan/Romano Cheeses shredded
Directions:
Turn oven to 400, in a bowl combine cauliflower, garlic, salt, pepper, oil, and butter. Mix until the cauliflower is well coated then place into a roasted pan or cookie sheet. Cook in the oven until you see nice browning (a dark caramel color) on most of the florets; which is about 20 minutes. Once cooked, get all of the garlic and cauliflower goodness from the pan, place in a blender (or use an immersion blender) with the can of chicken broth and shredded cheese. Here is your warning... anytime you are adding hot liquid to a blender, BE CAREFUL. The heat will want to be released and you might have a lid pop off. I am speaking from past experiences, believe me, clean up is not fun! :) Once it's all blended all together, there you have it, some tasty soup!


Chicken with an Oyster Mushroom Cream Sauce
Yummy!!!!! I would have preferred using Fettuccine or Linguine, but I only had Spaghetti or Shells... so I went with Shells. It tasted freaking Ahhhhmazing *grin*
4 Servings
Recipe:
2-3 tbs Butter (if using salted, check the finished flavor before adding more salt)
1/2 cup Heavy Cream
1 1/2 cups Oyster Mushrooms roughly chopped to about 1/4in thick pieces (It's hard for me to gauge quantity on mushrooms, it was about 2 1/2 large handfuls once it was roughly chopped; 4 clusters clusters of oyster mushrooms worth)
1/2 lb Chicken Breast cut into 2 in size pieces (this amount was 5 cuts of chicken tenders or 1 medium size breast)
3-4 tsp Garlic, minced (3-4 cloves)
Salt/Pepper to taste
Directions:
On medium/medium high heat in a large saute pan, melt 2tbs butter. Salt and Pepper the Chicken and add 2tbs of minced garlic. Let the chicken cook thoroughly before adding the other ingredients. Add the remaining butter and garlic and mushrooms. Once the mushrooms start to soften and have been coated in that buttery garlic goodness, add the cream. Heat it up and pour it over your cooked pasta. It would be pretty tasty over some mashed potatoes too! Mmmmm, mushroom, garlic, and cream oh you're good!


*** A bit of lemon zest or a dash of fresh grated nutmeg would probably be tasty too!! ***
Monday, October 31, 2011
Dinner Meal Plan October 30- November 5
Sunday: Meatloaf, Mashed Potatoes, and Sauteed Veggies
Monday: Chicken with Oyster Mushroom Cream Sauce
Tuesday: Roasted Garlic and Cauliflower Soup with Salad
Wednesday: Shiitake and Sesame Noodles
Thursday: French Toast
Friday: Vegetable Curry with Spinach Couscous
Saturday: Vegetarian Fajitas
Monday: Chicken with Oyster Mushroom Cream Sauce
Tuesday: Roasted Garlic and Cauliflower Soup with Salad
Wednesday: Shiitake and Sesame Noodles
Thursday: French Toast
Friday: Vegetable Curry with Spinach Couscous
Saturday: Vegetarian Fajitas
Tuesday, October 25, 2011
Dinner Meal Plan October 23- October 29
Sunday: Pork Chops and Potatoes with Apple Gravy
Monday: Restaurant Review! Fire and Spice!
Tuesday: Chicken Pot Pie
Wednesday: Tuna Wraps
Thursday: Spicy Baked Pasta
Friday: Maple Orange Chicken with Rice
Saturday: Roasted Pumpkin Soup
Monday: Restaurant Review! Fire and Spice!
Tuesday: Chicken Pot Pie
Wednesday: Tuna Wraps
Thursday: Spicy Baked Pasta
Friday: Maple Orange Chicken with Rice
Saturday: Roasted Pumpkin Soup
Tuesday, October 18, 2011
Recipes coming for Italian Sausage and Pasta, Butternut Squash Lasagna and Southwest Quiche!
Italian Sausage and Pasta

Butternut Squash Lasagna with Sausage

Southwest Quiche

Butternut Squash and Carmalized Onion Ravioli with Lemon Butter!
Yummy! I mean YUUUUUUMMMMMMYYY!!! This was one of those "made-up" recipes that actually worked the first time! Thank goodness, because I was excited for some butternut squash ravioli! I will be usin' that fillin' again! (Check out my Butternut Squash Lasagna, I used the same filling, but also added cooked sausage *grin*)

Recipe:
Makes 4-6 Servings (I didn't use all the dough, I used 3/4 of the dough, so my dish fed 4, but if you made the whole batch, you could easily feed 6)
Dough:
I used Tyler Florence's Recipe from FoodNetwork.com. Follow the instructions given on the website and you'll get a fabulous, very versatile pasta dough! (I didn't have a pasta machine, I used a rolling pin and stretched it by hand. If using only a rolling pin, take it a lot thinner than you think it needs to go. Less than 1/8" thick, closer to 1/16")
Filling:
3 cups Butternut Squash, diced (which is about 1 1/2 lbs. It was half of my squash, so my other half is getting turned into soup this week :)
2 cups Beef Broth (Chicken or Veggie broth should work too, I just wanted the depth that comes with Beef), and if you are using canned broth, it's 1 can.
1 cup water
1 medium Yellow Onion, halved and thinly sliced
2 tbs Butter plus 2 tbs for the lemon butter ending
1/2 cup Cottage Cheese (I improvised, if I would have had Ricotta, I would have used it, but the C.C. works as a great alternative!)
1/2 cup-3/4 cup total of Italian Cheeses (Mozzarella, Romano, and Parmesan)
1/4 tsp ground Garlic
1/8 tsp ground/grated Nutmeg
1 tbs Brown Sugar (optional)
Salt and Pepper to taste
Zest of 1 Lemon
Directions:
Cover the diced squash in the broth and water and cook in a medium sauce pan over medium high heat until the squash is tender, about 10 minutes (this is a good time to start carmalizin' your onions). Drain the squash (reserve the liquid and make some tasty butternut squash soup with it!) and use a food processor, blender, or hand masher to "puree" the squash.
I want to warn ya now, carmalizing onions takes some time. Once you have your onion halved and THINLY sliced, you'll want to melt the 2 tbs butter in a medium sauce pan (try to use a heavier pan, it retains the heat better) on medium high heat. Place the onions in the pan, with a little salt (about 1/4 tsp), stir them around so they are well coated in the butter. Cook on medium high heat until you can start to smell the onion cooking. This takes 1-2 minutes. Once you can smell the onion, turn the heat to medium low, then DO NOT STIR the onions! Let them brown and release their sugars, hence the name carmalized onion. This should take about 15 minutes, give or take a few depending on your pan and your stove.
Once the onions are done, chop them up to a small dice and place them in the pureed squash along with your cottage cheese, Italian cheeses, garlic, nutmeg, salt, and pepper. Taste it. If it isn't to your sweetness liking, add the 1tbs brown sugar here. Now your filling is complete. Fill your dough and there you have it!
Cook them in a slow boiling pot of water for about 4 minutes. While they are cooking, in the pan you carmalized your onions in. Melt the additional 2 tbs of butter and add the lemon zest to it. When you are pulling the ravioli out of the water, place them in the lemon butter and coat them before plating.
I hope you enjoy!
Sunday, October 16, 2011
Dinner Meal PLan October 16-October 22
Have I mentioned how much I LOVE gourds!? Well I do! And this week is exciting because I bought three of them at the grocery store. Here is to some butternut, acorn, and spaghetti squash goodness!!!
Sunday: Sausage and Butternut Squash Lasagna
Monday: Quiche
Tuesday: Roasted Chicken Breast with Roasted Acorn Squash
Wednesday: Spaghetti Squash with Portabello Mushrooms
Thursday: Butternut Squash and Apple Soup
Friday: Calzones
Saturday: Grilled Chicken and Veggies with a Peanut Sauce over Rice
Sunday: Sausage and Butternut Squash Lasagna
Monday: Quiche
Tuesday: Roasted Chicken Breast with Roasted Acorn Squash
Wednesday: Spaghetti Squash with Portabello Mushrooms
Thursday: Butternut Squash and Apple Soup
Friday: Calzones
Saturday: Grilled Chicken and Veggies with a Peanut Sauce over Rice
Monday, October 10, 2011
Dinner Meal Plan October 9- October 15
Sunday: Steak Burritos
Monday: Chili Cheese Dogs
Tuesday: Chicken Curry
Wednesday: Southwest Soup
Thursday: Pulled Pork Sandwiches
Friday: I was going to give a Restaurant Review for this night since my Dining Club Card expires at the end of the month, so I'm trying to us it as much as I can, but alas, it did not happen. I HAPPILY made Butternut Squash and Carmalized Onion Ravioli with Lemon Butter! I was soooooooo happy I stayed home :)
Saturday: Vegetable Stir Fry
Tuesday, October 4, 2011
Dinner Meal Plan October 2- October 8
Apparently I am not that good with busy school weeks and getting menus out! Next weeks meal plan should be out on time, if not early! hehe That also explains why the previous week I didn't post any pics or make any videos. Let's hope mid terms get over quickly and sanity is back in my life soon :)
Sunday: Pork Chops and Veggies
Monday: Pasta Casserole
Tuesday: Turkey Sausage with Fried Potatoes
Wednesday: Chicken Fried Rice
Thursday: Shredded BBQ Beef Sandwiches with Coleslaw
Friday: Taco Salads
Saturday: Homemade Pizza
Sunday: Pork Chops and Veggies
Monday: Pasta Casserole
Tuesday: Turkey Sausage with Fried Potatoes
Wednesday: Chicken Fried Rice
Thursday: Shredded BBQ Beef Sandwiches with Coleslaw
Friday: Taco Salads
Saturday: Homemade Pizza
Tuesday, September 27, 2011
Dinner Meal Plan for September 25- September 30
Sunday: Pot Roast with Carrots, Green Beans, and Mashed Potatoes
Monday: Grilled PB J
Tuesday: Rolled Chicken Tacos
Wednesday: Spaghetti with Italian Sausage
Thursday: Potato Casserole
Friday: Restaurant Review! Saffron Indian Bistro
Saturday: Split Pea Soup
Monday: Grilled PB J
Tuesday: Rolled Chicken Tacos
Wednesday: Spaghetti with Italian Sausage
Thursday: Potato Casserole
Friday: Restaurant Review! Saffron Indian Bistro
Saturday: Split Pea Soup
Restaurant Review El Sabor Norteno
Restaurant Review Time! Check out the tab to see my review!
El Sabor Norteno
Food Truck on the northeast corner of Los Reales and Cardinal!
El Sabor Norteno
Food Truck on the northeast corner of Los Reales and Cardinal!
Thursday, September 22, 2011
Chicken Salad
Recipe:
4 Servings
2 Chicken Breast, shredded (boil in salted water for 10-15 min and then shred with two forks)
1/2 cup Mayo
1/2 cup Red Grapes, cut in half (a medium size handful)
1/4 cup Apple, small dice (I really like gala for this salad and it's about 1/2 an apple)
1/2 Onion, finely diced
1/4 cup Green Onion, chopped
Salt and Pepper to taste
Mix the shredded meat and mayo together first, then add in the grapes, apple, and onions. Salt and pepper to taste and you're done. The double onion will leave you with bad breath, promise, but it will be soooooooooooo worth it! And Yeah, the recipe is that simple. Throw it on a few pieces of bread for a super tasty sandwich, or throw it on some chopped lettuce for a delicious salad *grin*


Homemade Sloppy Joes
Recipe:
Makes 6 full size sandwiches, 8 if you're using hamburger buns.
1 1/2 lbs Ground Beef (or Turkey)
1 16oz can Tomato Sauce
1/4 cup grated Carrot
1/2 cup dehydrated diced Green Bell Pepper
1/4 cup dehydrated diced Onion
3 tbs Sugar
2 tbs Distilled White Vinager
1 tsp Salt
1 tsp Pepper
1 tsp Granulated Garlic
1/8 tsp Chili Powder
Put all of the ingredients except the beef in a medium saucepan with a lid, bring to a boil. Once at a boil, turn heat down to medium/ medium-low and let simmer for 30-40 minutes. While the sauce is simmering, brown your ground beef, drain and set aside. Once the time is up, blend your sauce. You can use an immersion blender, regular blender, or food processor, just be careful since it's hot! This step is to chop up the carrot, green pepper, and onion even smaller. If you are not a big fan of texture, after you blend it all, put the sauce through a strainer and there you have some homemade sauce! Add the sauce to the Pre-cooked ground beef and there you have HOMEMADE SLOPPY JOES! Enjoy!

Pork Chili Rojo with Homemade Tortillas
Flour Tortilla Recipe:
Servings 12-14 10" torillas
*Disclaimer: I like flat tortillas, like the kind they use at Chipotle. If you like thicker tortillas, you'll want to add 1tsp baking powder to the recipe.
2 cups All Purpose Flour plus a few tablespoons for rolling out the dough
6 tbs Lard (I've used vegetable shortening too, but they just don't come out tasting as good)
1/2 tsp - 1 tsp Kosher Salt
1/2-3/4 cup HOT Water (It depends on the humidity in the air, so I recommend heating up a 1 cup of water and adding it until you get the right consistency)
Directions:
Combine the flour, salt, and lard. The lard should be at room temperature, you don't want "flaky" tortillas, so you don't have to worry about the lard being cold because you want elasticity, not flaky. You want to "cut" the lard into the flour with a pastry cutter, or just "cut" up the lard with your fingers. Using a pinching motion with all of your fingers, rub the lard and flour between your fingers and thumb to break it all up. Make sure to spread the lard out evenly, you don't want any big chunks of it. The flour, salt, lard mixture should hold it's shape when you get a handful, but still be pretty dry. If it is either to dry or to moist, add more flour or more lard to get the right texture.
Once you have that mixture ready, mix in the hot water. The water being hot helps with the elasticity (gluten) of the flour and melts the lard at the same time. Be careful here though, use a spoon to do the initial mixing, slowly adding in the hot water until the dough starts to come together. As you stir, the hot dough should now be cool enough to touch and kneed with your hands. You don't need to put it out on the counter or anything, you can kneed the dough in the bowl. Just work the dough by moving the dough ball around, pushing it onto itself and repeating. (Your dough shouldn't be wet, so if this is the case, add more flour and work the dough a little more. If you don't know if it's to wet, it's better to add the flour after the resting stage, during the rolling out stage ;)
Once the dough stops sticking to your bowl, and to you, and also feels soft and smooth. Cover the bowl and let the dough rest for 15-30 minutes. After it rests, pinch off little dough balls, (the size should be smaller than a golf ball, but bigger than a large marble.) You should be able to get 12-14 dough balls. Then get your rolling pin and some flour out and start rolling. (I like to get all of the dough balls ready at once and do all of my rolling at once, but you can do whatever makes you happy.)
Put some flour down on the counter, flour your rolling pin and start rolling. I find it the easiest to start rolling from the center of the ball out, but do whatever works for you. I'll also give you a heads up, unless you roll dough all the time into a circular shape, you are going to have some odd shaped tortillas at first. I purposefully took pictures of one of my prettier ones ;) You want to roll them really thin. You'll be surprised how far you can stretch that dough, but you want it to take on a more transparent then opaque look to it. Test a few consistencies and see what you like the best. And don't really worry, if the shape and thickness are a little off, they still taste the same. *grin*
I also heat up my pan to medium while I am rolling out the first tortillas. I'll then do a trade off, roll, check tortilla in pan, roll some more, flip tortilla in pan, roll again, poke bubbles down on the tortilla in the pan, roll some more, and take out cooked tortilla. I'll then place the tortilla I just rolled out into the pan, and start the process again until all of my dough balls are tasty cooked tortillas!
The entire process from start to resting to finish is about an hour. It is sooooo worth it though! While the tortillas are cooking, I have the Pork Chili Rojo simmering away.
Recipe Pork Chili Rojo:
1 lb Pork Short Ribs (I had boneless, but bone it would be tasty and add tons of flavor)
1 tbs Oil
1 Onion, diced
2 Garlic Cloves, diced
1 16oz can El Pato Red Enchilada Sauce
1-2 small can Roasted Green Chili, diced If you like more heat, add the second can.
Salt and Pepper to taste
Directions:
In a medium saucepan, brown the pork, onion, and garlic on med-hi heat. Once browned, add the tomato sauce and green chili's, turn the heat down to medium-low, Cover and let it simmer for 1-2hrs. It's that easy.
Plate it family style and enjoy!


:
Tuesday, September 20, 2011
Stuffed Cabbage, Turkey Club and Dill Potato Salad, and Red Beans and Rice
Stuffed Cabbage:

So this wasn't my favorite. I haven't ever made stuffed cabbage before and I didn't like my combo of sausage and veggies as the stuffing or the sauce I made up for the topping. It was tomato based and just kinda gross with the cabbage. Lesson learned though. I'm posting pics of the finished product, but not a recipe. Ya'll don't want to eat it, I promise. haha. I also want to give you the directions on how to prep the cabbage to be stuffed because I really do think that there is potential in it being really tasty. I now just have to go n a mission to find out what the "stuffed" part of the dish should be. Any recommendations or suggestions?
Prepping Cabbage:
1 Small head of cabbage made for 18-20 stuffed leafs (8-10 servings) varying in size as you get closer to the middle of the cabbage.
You'll need to have one pot of water boiling (with a little salt) on the stove with enough water for the leaves of the cabbage to be fully submerged.
You'll also need to have one large bowl of ice water near by so plunge the cooked cabbage into. This is called "shocking" and will retain the bright color of the cabbage leaf, keep it from becoming bitter, mushy, and smelling bad.
Once those things are in place, prep the cabbage. Cut off the bottom where the stem is and start taking off one leaf at a time. The leafs will probably tear a little, but that's okay, once they are cooked they will become pliable and it won't be a problem to fold the tears up.
Once you have your leaves ready, start by putting one in the boiling water. This will only take about 30 seconds. You'll see the cabbage become transparent in color, brighter green, and start to be able to bend on itself without tearing. Once you see it hit those three marks, you want to take the leaf out of the water with a pair of tongues and place the leaf in the ice water bath. Go ahead and repeat the process with all of the leaves of cabbage. Don't over crowd the boiling water (the cabbage can cook unevenly and you can get the bitter over cooked stuff with the perfectly cooked or under cooked leaves), but you can do multiple leaves at once, just be close enough to move the leaves around in the boiling water with a pair of tongues so you even out the heat distribution. You can however overcrowd the ice water bath all you want. Just if you notice it's not cold anymore, add more ice. Once all the cabbage leaves are cooked, drain them either in a colander and they are ready to be used.
Grilled Turkey and Cheese Club with Dill Potato Salad:


Ingredients per Sandwich:
2 slices of Bread
2 slices of Turkey (I like Oscar Mayer "Deli Fresh" Roasted Turkey)
2 slices of Bacon
2 tbs finely shredded Colby Jack Cheese (I find it melts better when it is shredded)
2-3 slices Tomato
1-2 leafs Romain Lettuce
1-2 tsp Butter
I know it's a simple recipe and you might not have needed the step by step for grilling a sandwich, but I thought, hey, why not. This is the same way I also grilled the "Turkey Reuben" (heating up the meats and toppings.)
Dill Potato Salad:
4 -6 medium cooked Red Potatoes, medium dice (throw them into a pot of boiling/salted water for 8-10 minutes after they are diced and it should give you a good potato salad potato. When in doubt, keep tasting and checking the texture of the potato as they are cooking. You don't want the raw flavor, crunchiness, or being to overcooked and falling apart)
1/2 medium Onion, finely diced
1/2 cup Mayo (again, ewe Miracle Whip or "salad dressing")
1-1 1/2 tbs dry Dill
1-2 tsp Kosher Salt (to taste) I recommend adding it after you have tasted it after adding the dill and mayo though
1/2-1 tsp Pepper (to taste)
Mix all of the ingredients together while the potatoes are still hot/warm, (this allows the mayo to spread and be soaked up, the flavor of the onion and dill to spread out pretty evenly.) Taste it at this point and decide if you want to add salt. Now you are ready to enjoy. It's awesome warm or awesome if you have time to let it cool down.
Red Beans and Rice with Sausage:

Recipe:
Coming soon! :)
Sunday, September 18, 2011
Dinner Meal Plan for September 18-September 24
Sunday: Homemade Sloppy Joes
Monday: Broccoli Cheese Soup
Tuesday: Lemon Herb Chicken with Rice
Wednesday: Pork Chili Rojo with Homemade Tortillas
Thursday: Chicken Salad Sandwiches with Green Bean Salad
Friday: Restaurant Review Night! El Sabor Norteno! Mexican Food Stand
Saturday: Turkey Sausage and Penne
Monday: Broccoli Cheese Soup
Tuesday: Lemon Herb Chicken with Rice
Wednesday: Pork Chili Rojo with Homemade Tortillas
Thursday: Chicken Salad Sandwiches with Green Bean Salad
Friday: Restaurant Review Night! El Sabor Norteno! Mexican Food Stand
Saturday: Turkey Sausage and Penne
Thursday, September 15, 2011
Meatloaf, Turkey Rueben, Chilaquiles and Red Beans and Rice
Hi all!
Here are a few of last weeks photos... in the next day or two, I'll also post the recipes. *grin*
Meatloaf and Garlic Mashed Potatoes:

Recipe for Meatloaf:
6-8 Servings
11/2 lbs ground beef
1 cup regular or quick oats (you may need more after the egg is added, so keep some extra handy)
1 egg
1/4 cup carrot (about 2 medium carrots), finely grated
1 tbs celery (1 medium stalk), finely grated
1/2 yellow onion, small dice OR 2 tbs dehydrated onion
1/2 green bell pepper, small dice OR 2 tbs dehydrated green bell pepper
1 clove garlic, minced
Salt to taste
Pepper to taste
In a large bowl, combine the meat, carrot, celery, onion, bell pepper, and garlic. Mix well with your hands until the veggies are spread throughout the meat mixture. Then add the oats, mixing together well. You should notice the meat becoming "drier", that's okay, now you're going to add the egg. The egg acts as a binder, so it helps the meatloaf keep it's shape. You want the moisture content to go back to what it was before you added the oats (which as a side note: you can substitute crushed crackers or pre cooked rice instead of the oats too). If it's still a little to "gooey", add more oats until the meat feels "full", but is still moist (not gooey).
You'll then want to place it on a foil lined pan, forming it into an even shape. More like a rectangle than an oval too. The rectangle shape helps it to cook more evenly without drying out the ends of the meatloaf. You then want to put the meatloaf into an already heated 350degree oven, and let it cook for 35-45 minutes. If you are a fan of ketchup or a tomato sauce on top of your meatloaf, you have two options... add it before you put it into the oven, or add it to the top about 5 minutes before it is done. Your choice, I don't add it on mine, so I don't have a preference. Once it's cooked, make sure to let it rest before cutting into it; about 5-8minutes.
Turkey Reuben:

Recipe Per Sandwich:
Two Slices Bread (tradition calls for Rye, but I had wheat, so I went with it)
2-3 slices of Turkey sandwich meat (I really like the new Oscar Mayer "Deli Fresh" meats.)
1-2 slices of Swiss cheese (preference here. If you like cheesy gooeness, go for 2 slices, if you just want the flavor and not the gooey, go with one :)
1/4 cup Sauerkraut
1-2 tbs sauce (See Recipe Below)
1-2 tsp butter
Directions:
Heat a medium size skillet on medium, allowing for the pan to heat up evenly. Once pan is ready, add 1/2-1 tsp of butter, allow it to melt; before the butter browns, place a slice of bread onto the melted goodness and move it around, to give the whole slice of bread and even coat of the butter. While this side of the bread is toasting, add the turkey meat to the pan, allow it to heat up and then place it on the bread. Once the turkey has moved to the bread, repeat the heating up method with the sauerkraut until it's warm, and then add the cheese to that before putting the pile of kraut onto the turkey. Close the sandwich by adding the other slice of bread, using a spatula to hold the sandwich while you place the butter in the pan to melt. Again, once butter melted, place the bread on the melted butter and move it around to get an even browning on that slice too. Once it is browned, remove it from the heat, open the bread up and put on your sauce. Mmmmm, so good!
*Sauce Recipe a.k.a. "thousand island" dressing
1/4 cup Mayo (no miracle whip folks, it would taste to sour and I just think miracle whip is gross. Sorry if ya'll love it)
2 tsp Ketchup
2 tsp DILL pickle relish
Stir them all together and you have a tasty topper to your Turkey Reuben!
Chiliquiles:
Recipe: Coming Soon

Red Beans and Rice:
Recipe coming soon... and yes, the rice is supposed to look purple. It's a whole grain black, red, and white rice combo *grin*

Here are a few of last weeks photos... in the next day or two, I'll also post the recipes. *grin*
Meatloaf and Garlic Mashed Potatoes:

Recipe for Meatloaf:
6-8 Servings
11/2 lbs ground beef
1 cup regular or quick oats (you may need more after the egg is added, so keep some extra handy)
1 egg
1/4 cup carrot (about 2 medium carrots), finely grated
1 tbs celery (1 medium stalk), finely grated
1/2 yellow onion, small dice OR 2 tbs dehydrated onion
1/2 green bell pepper, small dice OR 2 tbs dehydrated green bell pepper
1 clove garlic, minced
Salt to taste
Pepper to taste
In a large bowl, combine the meat, carrot, celery, onion, bell pepper, and garlic. Mix well with your hands until the veggies are spread throughout the meat mixture. Then add the oats, mixing together well. You should notice the meat becoming "drier", that's okay, now you're going to add the egg. The egg acts as a binder, so it helps the meatloaf keep it's shape. You want the moisture content to go back to what it was before you added the oats (which as a side note: you can substitute crushed crackers or pre cooked rice instead of the oats too). If it's still a little to "gooey", add more oats until the meat feels "full", but is still moist (not gooey).
You'll then want to place it on a foil lined pan, forming it into an even shape. More like a rectangle than an oval too. The rectangle shape helps it to cook more evenly without drying out the ends of the meatloaf. You then want to put the meatloaf into an already heated 350degree oven, and let it cook for 35-45 minutes. If you are a fan of ketchup or a tomato sauce on top of your meatloaf, you have two options... add it before you put it into the oven, or add it to the top about 5 minutes before it is done. Your choice, I don't add it on mine, so I don't have a preference. Once it's cooked, make sure to let it rest before cutting into it; about 5-8minutes.
Turkey Reuben:

Recipe Per Sandwich:
Two Slices Bread (tradition calls for Rye, but I had wheat, so I went with it)
2-3 slices of Turkey sandwich meat (I really like the new Oscar Mayer "Deli Fresh" meats.)
1-2 slices of Swiss cheese (preference here. If you like cheesy gooeness, go for 2 slices, if you just want the flavor and not the gooey, go with one :)
1/4 cup Sauerkraut
1-2 tbs sauce (See Recipe Below)
1-2 tsp butter
Directions:
Heat a medium size skillet on medium, allowing for the pan to heat up evenly. Once pan is ready, add 1/2-1 tsp of butter, allow it to melt; before the butter browns, place a slice of bread onto the melted goodness and move it around, to give the whole slice of bread and even coat of the butter. While this side of the bread is toasting, add the turkey meat to the pan, allow it to heat up and then place it on the bread. Once the turkey has moved to the bread, repeat the heating up method with the sauerkraut until it's warm, and then add the cheese to that before putting the pile of kraut onto the turkey. Close the sandwich by adding the other slice of bread, using a spatula to hold the sandwich while you place the butter in the pan to melt. Again, once butter melted, place the bread on the melted butter and move it around to get an even browning on that slice too. Once it is browned, remove it from the heat, open the bread up and put on your sauce. Mmmmm, so good!
*Sauce Recipe a.k.a. "thousand island" dressing
1/4 cup Mayo (no miracle whip folks, it would taste to sour and I just think miracle whip is gross. Sorry if ya'll love it)
2 tsp Ketchup
2 tsp DILL pickle relish
Stir them all together and you have a tasty topper to your Turkey Reuben!
Chiliquiles:
Recipe: Coming Soon
Recipe coming soon... and yes, the rice is supposed to look purple. It's a whole grain black, red, and white rice combo *grin*

Sunday, September 11, 2011
Dinner Meal Plan for September 11-September 17
This week has been a we bit busy with school, work, and every day living. Sorry for the late posting for next weeks meal plan! One of these days, I'll be super on top of things and have two weeks planned at a time! Today, is not that day though, so you're getting the meal plan the day of. *grin*
Sunday: Raspberry Citrus Pasta Salad
Monday: Homemade Vegetable Soup
Tuesday: Baked Potato Bar
Wednesday: Stuffed Cabbage
Thursday: Grilled Ham and Cheese with Dill Potato Salad
Friday: Roasted Chicken with Veggies
Saturday: Red Beans and Rice
Sunday: Raspberry Citrus Pasta Salad
Monday: Homemade Vegetable Soup
Tuesday: Baked Potato Bar
Wednesday: Stuffed Cabbage
Thursday: Grilled Ham and Cheese with Dill Potato Salad
Friday: Roasted Chicken with Veggies
Saturday: Red Beans and Rice
Saturday, September 10, 2011
Blog Update: September 10
The review for Joe's Real BBQ is now posted under the Restaurant Review Tab! I also have added a few Favorite Quotes and Cookbook Recommendations! I LOVE kitchen and food quotes, so if you all have any favorites, send them my way and I'll get them posted too! *grin*
-Sarah
-Sarah
Friday, September 2, 2011
Dinner Meal Plan for September 4-September 10
Soooo, I'm a day late getting this post up, but I still got it up before Saturday! Yay me! ha ha.
This coming week, the meals are going to be tasty! Here ya go...
Sunday: Meatloaf with Garlic Mashed Potatoes
Monday: Turkey Reuben Sandwiches
Tuesday: Homemade Pizza
Wednesday: Eggplant Parmesan (Video of the Week)
Thursday: Cuban Black Bean Soup (Crock Pot)
Friday: Seared Shrimp with Coconut Rice
Saturday: Chilaquiles
Thursday, September 1, 2011
Video of the Week: Tacos and Poppers!
First Videos! Yay!
Don't judge to harshly ;) I didn't realize my camera turned off during the "filming" of the taco part of this little adventure, so it's a we bit choppy! Sorry! There are also two different videos, so to get the final product on the Poppers, you'll need to check out the end of the "taco" video. *Warning* It's also you only seeing my hands doing the work and hearing me talk. hehe. I didn't have a camera guy. Next time, I'll try the full view of me and the cookin'. I hope you enjoy it though, despite the imperfections! Please comment with any questions, or recommendations, or to even, just say *hi*.
Yay! For Cooking Videos!
Sarah
Poppers!
& Tacos!
Tuesday, August 30, 2011
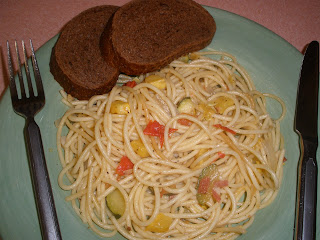
Spaghetti with LIME Butter Sauce
So... I totally forgot to buy a lemon! hehe. So I improvised! And let me tell you what, IT WAS GOOOOOOD! I used lime, Key lime that is. Here is the Recipe.
Serves 3-4
1/2 package or 8oz Spaghetti cooked "al dente" (the dish tastes better with a bit more texture, so try for al dente, instead of softer noodles) Here is the National Pasta Associations directions for al dente
1 small yellow squash, or half of a larger one, 1/2 inch dice
1 small zucchini, or half of a larger one, 1/2 inch dice
1/2 medium yellow onion, 1/2 inch dice
2 Roma tomatoes diced
2 cloves diced garlic
1 tbs olive oil
4 tbs salted butter
2 slices turkey bacon, crumbled (okay, let's be honest, turkey bacon doesn't crumble the same as pork bacon, so once you have them crisped up (or before you cook them), stack 'em and give them a really good chop. Your looking for "bacon bit" size pieces)
4 tsp Key lime juice (I totally used the little lime shaped juice concentrate from the fridge)
Salt and Pepper to taste
Red Pepper Flakes to taste
Take a breath, here I go.
While the spaghetti is cooking, dice up your veggies and place them in a bowl. Dice your garlic, add half of it to the veggies. Reserve the other half for the lime buttery goodness. In a large saucepan, on medium high heat, cook your bacon, take it out of the pan, set aside (chop it once it cools). Add your veggies to the pan, along with the olive oil, a pinch of salt (to be honest, I LOVE salt, so if you are not as big of a fan, opt not to add it here. You can check the flavor at the end and see if you want to add any more once the butter sauce is on the noodles and veggies) and some pepper. Cook them until onions are transparent and squashes and tomatoes are starting to break down, but are still holding their shape. Place them back in their bowl, and set aside. Now is the time for the lime butter sauce. Add the butter, bacon, and garlic into the same pan. Turn heat down to just above medium. Once the butter has loosened the goodies on the bottom of the pan and has turned a light caramel color, add the lime juice. Let it cook for 1 minutes or so. Then turn off the heat. Once the noodles are done, you will drain them, and add the noodles to the lime butter, coat them really well, and then add in the veggies! This is where you want to taste it, for seasoning. And there you have it folks, Spaghetti with Lime Butter Sauce!
p.s. I also am a huge fan of red pepper, but those who eat my food, are not all fans, so I opted to add the red pepper flakes to my own plate and, it was good!
p.p.s. I didn't have any Parmesan, but, it would have been super tasty with that added in too!
p.p.p.s I know, I know, there are a lot of these, but I wanted to tell ya something... I did cook a whole package of spaghetti for this, but I was afraid the flavor wouldn't spread out as well, that's why I only used half the package. If you want to serve 6-8 though, you can cook the whole package of pasta and just add a couple more tablespoons of butter and a few more teaspoons of lime juice to the lime butter sauce before you add the noodles and you're good to go. There is enough bacon, garlicy goodness to spread out on the added noodles too.

Monday, August 29, 2011
White Bean Chili Crock Pot Style
Servings: 8-10
Ingredients
1lb uncooked white beans (or 2-3 cans, drained)
1 28oz can El Pato, RED Enchilada Sauce (I used mild, but kick it up to your heat preference)
1 14.5oz can diced tomatoes (drained)
1 lb ground beef (or you can use ground turkey or ground pork, or go vegetarian and add more veggies)
1 cup diced carrots
1/2 cup diced dehydrated* onion or 1 medium diced yellow onion
1/3 cup diced dehydrated* green bell pepper or 1 medium diced bell pepper
* I have some dehydrated vegetables in my food storage that I try to rotate in and use. They work perfect in the crock pot or even in lasagnas because they absorb the "extra" liquid.
2tsp chili powder
2-4 tsp kosher salt (this is completely to taste. I would start with the 2tsp at the beginning when placing everything in the pot, and when it's done, taste it; add more salt if needed.)
2 tsp black pepper
Quick Directions:
First cook the beans. I don't do the soak over night kind of bean. I do the; rinse, put into a pot with 6-8 cups of water, bring to a boil, boil for 5 minutes, take off of the heat, let soak for 1hr, rinse again. Place swelled beans in another 6-8 cups of water with about 1tbs salt added in, and simmer for about 2hrs, or until beans are cooked. I'm sure there is a way to put the beans in the crock pot too, I just haven't played around with it that much. I do find it easy to just set them on the stove, set a timer, and get ready for the day while not worrying about them :)
Then, place your ground beef, carrots, onions, green peppers, and seasonings into the crock pot. Follow with the drained beans, El Pato, and diced tomatoes. Stir them all together, place the crock pot on LOW and within 3 hours, you're ready to eat!
Enjoy it with some cornbread, biscuits, or crackers!
Saturday, August 27, 2011
Dinner Meal Plan for August 28-September 3
This week, I am going to try and do something different... I'll try and post the ingredient list for each meal, along with a "quick" how to. I'll go into further detail with the "Video of the week" dinner though.
Sunday: White Bean Chili with Cornbread
Monday: Homemade Macaroni and Cheese with Grilled Tomato Sandwiches
Tuesday: Spaghetti with Lemon Butter Sauce
Wednesday: Fried Chicken with Coleslaw
Thursday: Tacos and Stuffed Jalapenos (Video of the week) side note: I did just make these a week and a half ago, but I like to make new recipes again, so I can get the "how to" down.
Friday: Chicken Kabobs with Rice
Saturday: This dinner, is the start of my fast (a religious observance in my faith), but I will be going to a fun new restaurant for lunch, so I'll give ya a Restaurant Review for Joe's Real BBQ in Gilbert, Arizona
This week is going to be FUN! I am really excited! Sorry for not getting this up sooner. I'm going to also try and change my posting day to Wednesdays or Thursdays for the following week. Let me know if you have any suggestions for my blog, or questions that I might be able to answer. Have a great week!
Friday, August 26, 2011
Kitchens = Peace. Comfort. Creativity. And Love!
Better perspective of me, Sarah, the food blogger.
This week, like I said, school started. My art class was my first class (which I was super excited about and still am), and it was the class that I finished the first homework assignment for.
This week, like I said, school started. My art class was my first class (which I was super excited about and still am), and it was the class that I finished the first homework assignment for.
The first assignment was to choose a location, explain what I see, and how I feel in it. The location needed to be somewhere that expresses who I am and be somewhere that for you, the reader, allows you to experience being there from my view. The first "place" that popped in my head, was... the kitchen! Of course. lol. I don't think anyone who knows me at all would be surprised about that one, so I wanted to share my first completed assignment with ya'll. Just so, that you know, I am in LOVE in the kitchen and what that all encompasses. You may think it's weird, and I'm okay with that. haha.
Here ya go...
Hi. My name is Sarah and I am a kitchen addict. Not just addicted to my own kitchen either, most kitchens will do, well almost. I do need order and cleanliness to function at my fullest. When those things are in place though, I find peace, comfort, and creativity there. I experience my thoughts deepen on many subjects while I am working in the kitchen. I also feel I can express a part of my love through my sacrifice of time; not only in the time preparing the meal, but in the time I take in learning and improving my skill. I am also able to express myself with the décor, food choices, and flavors that I choose to work with.
I truly love that, in a kitchen, there are colors everywhere! From the containers my foods are stored and cooked in, to what the foods are plated and presented on, to a beautiful rainbow of color in the food itself. It is my goal, to not only make the meal delicious, by using the right combination of flavors, but to make it just as delicious visually; Which is how I feel we truly “taste” anyway, by using all of our senses. I try to keep things interesting too, by using a combination of colors, shapes, sizes, and textures in all aspects of the kitchen.
Picture this… Bright red, imperfectly, diced tomatoes, slices of vibrant yellow and orange peppers. Dramatic green; fragrant basil, shredded Parmesan cheese, that not only adds the right flavor, but adds the right texture, for the taste buds and visually. Combine all of that color and texture together with some fresh cooked linguine, a few pinches of deep, dark, spicy crushed red pepper, a dash of pure, white, sea salt, and a drizzle of beautiful, rich green olive oil in a beautiful handmade saffron colored bowl… Oh the goodness that is in that dish!
So, yeah, I guess, that is the reason why I am a kitchen addict. I love to use all of my senses, so I am a "sensible" person you see.
Here is hoping that my professor likes my angle :)
Thursday, August 25, 2011
Apologies
Hello all! Apologies to everyone for not having more posts this week... I was a we bit busy. School started and I had a last minute trip out of state. I will be back on the ball by Saturday! Promise! Happy planning, cooking, and tasting til then!
Sarah
Sarah
Saturday, August 20, 2011
Dinner Meal Plan for August 21- August 27
Here we go for this week!
Sunday: Hawaiin Haystacks (Crock Pot Meal)
Monday: Stuffed Peppers
Tuesday: Bacon Wrapped Chicken with mashed potatoes
Wednesday: Chicken BLT Wraps
Thursday: Quiche (Recipe of the Week)
Friday: Lasagna with White Sauce, Chicken, and Spinach
Saturday: Homemade Biscuits and Gravy
Sunday: Hawaiin Haystacks (Crock Pot Meal)
Monday: Stuffed Peppers
Tuesday: Bacon Wrapped Chicken with mashed potatoes
Wednesday: Chicken BLT Wraps
Thursday: Quiche (Recipe of the Week)
Friday: Lasagna with White Sauce, Chicken, and Spinach
Saturday: Homemade Biscuits and Gravy
Wednesday, August 17, 2011
Recipe of the Week: Peanut Butter Banana Pancakes!
This is a combo Recipe. I can't take credit for the Peanut Butter Pancakes or the idea to use Banana's in the way I did either. I know. I'm a cheater, but by golly, I know how to combine two amazing foods, to make an extra tasty one! Let me just tell you. These were FREAKING gooood!
The Peanut Butter Pancake recipe, all props go to Sunny Anderson from Food Network. I found the recipe a few years ago, before she made a video for it. They are the fluffiest, best tasting pancakes ever! Here is the video in case you want to watch it too! Peanut Butter Pancake Video
The idea to place sliced bananas and brown sugar on them before giving them their first flip came from the amaaaaazing Bobo's Cafe here in Tucson. They make the, Best. Breakfasts. Ever!
So tallah! The combination of these two things make these pancakes heavenly. Add a glass of cold milk and it's even better!
Here is the recipe!
Makes about 8 small pancakes, 4-6 medium
½ cup melted peanut butter
1 cup flour
4tbs sugar
1/2tsp salt
1 tbs Baking powder
1 egg
1 cup milk + more if you need it for the right consistency
2tbs canola/vegetable oil
Cooked on Topping:
2-3 bananas
2-4 tbs brown sugar


You first melt the peanut butter. In the video, Sunny used the double boiler route. I usually use the glass bowl in microwave for 30 seconds route. Both methods work. You then want to whisk the warm peanut butter, egg, milk, and 2tbs of oil. Once the wet ingredients are mixed together, slowly combine with the dry ingredients. Living in the desert, I have found I generally have to add more liquid. So, if you're an Arizonan, you might want to automatically start with 1 1/4 cup of milk. You want it to be thin enough to pour out of a ladle and spread slightly, but thick enough that it will hold it's shape well in the pan. Thick like... a milkshake that has half melted and you stir the melting part with the solid ice cream left in the cup to "thicken" it up *grin*. FYI: You'll get a fluffier pancake if you don't over mix. It's okay to see a few small clumps.

Once you have the batter ready, get the pan heated up. Cast iron works the best, but a griddle pan, or saute pan will work too. Medium high heat. While the pan is heating up, you can slice your bananas and get them ready to go. Once heated, get a little butter and grease the pan. Then ladle/spoon your first pancake in.

Once the batter is in the pan, place sliced banana and sprinkle 1-2 tsp of brown sugar on each pancake (on the wet batter) The batter will not likely "bubble" like you are used to seeing with other pancakes because of the heaviness of the peanut butter, so check it often for done-ness and nice browning.

Once the first side is done, using a metal or thin plastic spatula, flip your pancake. Let the bananas and the brown sugar caramelize! My pancakes took about 1-1 1/2minutes per side.

Then you are ready to take out of the pan and plate up the goodness! I served them with a side of sausage and a glass of cold milk. Mmmmmm!

Also, from the recipe a few years ago, Sunny said you can make the batter the night before, which I have. I just thinned it out with milk in the morning. They were just as tasty too!
Saturday, August 13, 2011
Dinner Meal Plan for August 14- August 20
Sunday: Breakfast for Dinner! Peanut Butter Banana Pancakes! (see Recipe of the Week)
Monday: Dinner Party at a friends house, Asian theme! I'm bringing Fried Rice
Tuesday: Pineapple Chicken with Rice
Wednesday: Salsbury Steak and Mashed Potatoes
Thursday: Creamy Noodles with Chicken and Veggies (I couldn't come up with a cool name for this dish, so when I do, this will be updated :)
Friday: Tacos/Burritos with Black Beans and Stuffed Jalepenos
Saturday: Pork Chops and Applesauce with Potato Pancakes
I'm excited for next week! Bring on the cooking!
Thursday, August 11, 2011
Recipe of the Week: Linguine and Meatballs


Linguine and Meatballs
Serves 4
1/2 package of linguini, follow packaging for cooking instrucitons
Sauce:
1 16oz can of whole or diced tomatoes
1 medium onion, fine dice
2 tsp garlic, diced
2tsp EACH dried basil, thyme, oregano, and rosemary (break the rosemary up in the hand before adding)
1/2tsp crushed red pepper (if desired)
2tbs olive oil
2tsp salt (or to taste)
*you may find that the tomatoes are really acidic in the can, if this is the case, add 1/2-1tsp on sugar
In a medium saucepan, on medium high heat, saute the onion and garlic the the olive oil. Once the onion is softened, add all of the dried herbs and salt. Stir them for 1 minute to release their aroma. Then add tomatoes (if using whole, hand crush them before putting them in, or use a masher once they are in the pan) Turn the heat down to medium and let simmer un-covered for 20min. This let's the water evaporate and flavors to condense. Also, allows the sauce to thicken.
The sauce is ready to eat now, on spaghetti, but since I had linguine, this is where I added the Philadelphia Italian Cooking Cream. Mix it in and let simmer an additional 5 minutes. Now is the time to taste it. If it is still a little weak on flavor, add more basil or oregano. I would be careful with the thyme and rosemary since they have stronger flavors and can over power a sauce more easily. If you add more herbs, turn the heat down to medium low and let simmer while you make the pasta and finish the meatballs.(If you don't like a "rustic" type sauce, use tomato puree instead of whole or diced tomatoes, or when the sauce is done, place it in the blender until you get the desired consistency.)
Meatballs (I like to get these ready while the sauce is simmering):
1lb ground beef (you can use a half and half combo of ground pork and beef, or even turkey. The turkey will have a different end texture, but should still be good)
1/2 medium onion, finely diced
1-2 tsp diced garlic
1tsp dried basil
1tsp dried oregano
1/4-1/2 cup Italian bread crumbs (if using plain bread crumbs, oats, or crushed saltines, increase herbs to 2tsp each)
1 egg
1-2tsp salt or to taste
olive oil
Your hands will work the best for this, so don't be afraid to get a little messy. Mix the meat, diced onion, garlic, herbs, and salt together. Add 1/4c of the bread crumbs and mix together. Add the egg, then mix together some more. Make sure to evenly distribute all of the ingredients. If the mixture still feels moist, aka, gooey, add a few tablespoons of additional bread crumbs at a time. As weird as it sounds, the meat should feel "full", not to dry, not to wet and be able to hold the shape of a meatball.
Once this is done, I like to heat up my saute pan and cook a little piece of the meat to make sure my seasonings are right on. When you like the flavor of the cooked meat, it's time to make some meatballs. With this recipe, you can make about 14 medium, or 20 small meatballs. Medium meatballs is about 3tbs of meat, rolled together and the smaller ones are about 1 1/2tbs of meat.
Roll the meat and place the meatballs in the saute pan as you go, on medium high with a little oil in the pan. This will help to prevent sticking and to help with browning. If you prefer rolling them all first and then cooking, you can totally do that too. The medium size meatballs take about 2 minutes per side, and you want to turn them on all sides. Even browning and cooked centers are what we are going for. Once they are done, set them aside, drain them on a paper towel if desired. You can also add the meatballs to the sauce before serving.
And there you have it folks, I hope you like it!
Subscribe to:
Posts (Atom)